Home >>ReactJS Tutorial >ReactJS Router
ReactJS Router
ReactJS Router
Routing is a process that directs a user to specific pages based on their action or request. ReactJS Router is used primarily to build Single Page Web Applications. React Router is used in the application for specifying multiple routes. When a user types into the browser a specific URL and this URL path matches any 'route' inside the router file, the user will be redirected to that particular route.
React Router is a standard library system built on top of the React and used with React Router Package to create routing within the React application. It provides data which will be displayed on the web page to the synchronous URL on the browser. It preserves the application's standard structure and behavior, and is used primarily for develop single-page web applications.
Need of React Router
React Router plays a key role in displaying multiple views within a single page application. Without the React Router, several views can not be shown in React applications. Instagram uses most social media websites like Facebook to render multiple views using React Router.
React Router Installation
React comprises three distinct routing sets. These are:
- It provides the main routing components and functions for React Router applications.
- React-router-native: Used for mobile apps.
- React-router-dom:This is used for the creation of web applications.
React-router can't be installed directly into your application. First, you need to install react-router-dom modules into your application to use react routing. To install the react router dom, use the command below.
$ npm install react-router-dom --saveStep 1 - Install a React Router
A quick way to install a react-router is to execute the following code snippet in the prompt command window.
C:\Users\username\Desktop\reactApp>npm install react-routerStep 2 - Create Components
We'll be creating four components in this step. The component of the App will serve as a tab menu. If the route has modified, the other three components (Home), (About) and (Contact) are rendered.
main.js
import React from 'react';
import ReactDOM from 'react-dom';
import { Router, Route, Link, browserHistory, IndexRoute } from 'react-router'

class App extends React.Component {
   render() {
      return (
         <div>
            <ul>
            <li>Home</li>
            <li>About</li>
            <li>Contact</li>
            </ul>
            {this.props.children}
         </div>
      )
   }
}
export default App;

class Home extends React.Component {
   render() {
      return (
         <div>
            <h1>Home</h1>
         </div>
      )
   }
}
export default Home;

class About extends React.Component {
   render() {
      return (
         <div>
            <h1>About</h1>
         </div>
      )
   }
}
export default About;

class Contact extends React.Component {
   render() {
      return (
         <div>
            <h1>Contact</h1>
         </div>
      )
   }
}
export default Contact;
Step 3 - Add a Router
Now, we 're going to add routes to the app. Instead of rendering the App element like in the previous example, the Router is rendered this time. We 've built components for each route as well.
main.js
ReactDOM.render((
   <Router history = {browserHistory}>
      <Route path = "/" component = {App}>
         <IndexRoute component = {Home} />
         <Route path = "home" component = {Home} />
         <Route path = "about" component = {About} />
         <Route path = "contact" component = {Contact} />
      </Route>
   </Router>
), document.getElementById('app'))
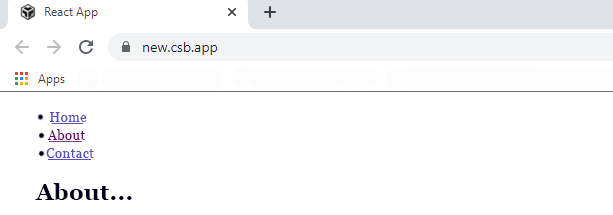
When execute the code you can get the following output-

